This tutorial will help you add a new widget to your website.
There are two methods
The main focus of this tutorial is to explain how to do with by using the Wizard.
The "Add Ons" method is described at the end.
Using the Wizard to Add Widgets
There are 2 steps to add a widget using the Wizard
- Use the Widget Wizard to create your new widget and add to the home page
- Move your widget the desired page.
1. Create a new widget
- Open the Buying Buddy App Dashboard by clicking any Buying Buddy widget and then the "Manage" button.

- On the App Dashboard, scroll down to find and click the button to go to the "Widget Wizard".
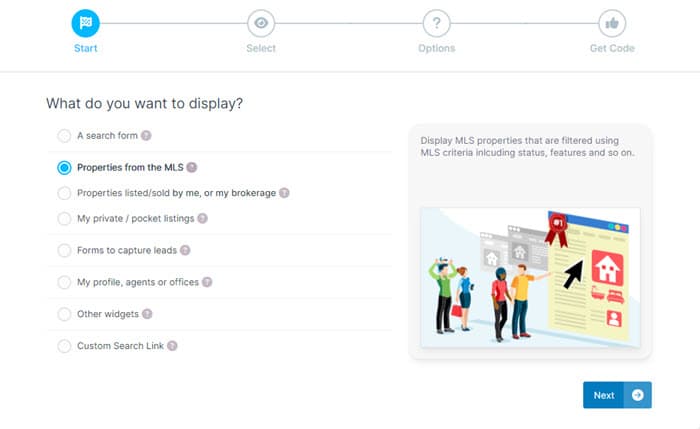
- Then follow the steps in the Wizard.
- Continue through the wizard selecting any of the filter options available that can include: MLS fields, property status, listing agent, listing office and more.
- On the final step of the Wizard, select the "Add Widget" tab on the left. Then click the "Add to Wix" button.
- Wait a few moments while Buying Buddy adds the Widget to your website home page.
- When the process is completed, you will be shown the new widget on your Home Page in the Wix editor.

2. Move the Widget to the desired page
- Right-click the new widget to show the contextual menu, and select "Cut". Move the widget

- Now, go to the page where you want to place the widget.
- Right-click the background of the page to show the contextual menu, then select "paste".
- Now you can continue to edit this page.
Using The "Add-Ons" Method to Add Widgets
The Add-Ons method adds a widget to a page. Add a filter to customize the widget.
There are 2 steps to add a widget using this method:
1. Add the Widget
- In your Wix Editor, click any widget that is already on a page to see the "Settings" and "Manage" white buttons.
Then click the "Settings" button for the current widget to show the settings panel. - In the left menu of the settings panel, click "Add-Ons". This will then display the Add-Ons panel.
(If you don't see the "Add-Ons" menu item - repeat this action with a different widget).
- Now scroll down the Add-Ons panel to find the widget you want to add.
Click "Add To Page" to choose where you want to add the widget.
The widget will then added to your selected page.
2. Add a filter to customize the widget
- In the Settings panel for the Widget, click the "Settings" menu link on the left to see the Widget Filter field.
- Paste a widget filter to this field and save. Make sure to select and overwrite all the contents in this field
You can add a filter manually or use the following approach to use the Wizard to create your filter.
- Click the widget to see the "Settings" and "Manage" white buttons.
Then click the "Manage" button to show the Buying Buddy App Dashboard - Now click the Wizard button
- Use the Wizard to create the widget.
- On the last step, click the tab on the left to show the filter.
Copy this filter. - Return to the Wix editor and open the Settings panel for the Widget.
- In the Settings panel for the Widget, click the "Settings" menu link on the left to see the Widget Filter field.
- Paste a widget filter to this field and save.
Make sure to select and overwrite all the contents in this field
Ideas for Doing More
- Use widgets to add MLS content to your website
- Use the Wizard to create more widgets to help your marketing.
- See our demonstration website for inspiration and ideas.