This tutorial will help you modify an existing widget by replacing the filter.
Replacing a filter on an existing widget is the quickest way to change a widget.
There are 2 steps to modifying a widget:
- Use the Widget Wizard to create a new filter
- Copy-and-paste the new filter into the Settings for the widget.
1. Use the Wizard to create a new filter
- Open the Buying Buddy App Dashboard by clicking the Buying Buddy widget, and then select the "Manage" button at the top.

- On the App Dashboard, scroll down to find and click the button to go to the "Widget Wizard".
- On the first step, select the same widget you are modifying.
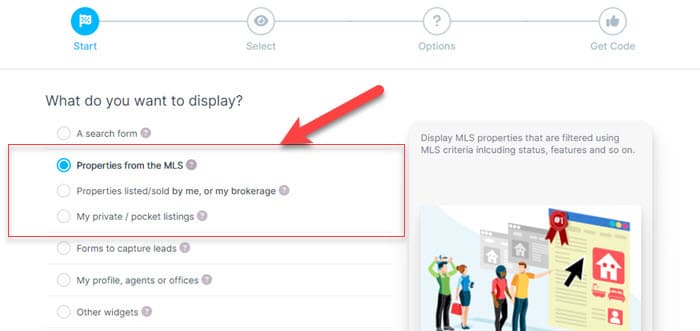
- Continue through the wizard selecting any of the filter options available that can include: MLS fields, property status, listing agent, listing office and more.
- On the final step of the Wizard, select the "Get Filter" tab and copy the filter to your clipboard.

2. Update the Widget with this new filter
- Return to your Wix Editor.
Click the Buying Buddy widget and then the "Settings" button to show the settings panel for this widget. - In the settings panel, click the "Settings" tab on the left to show the "Widget Filter" field.

- Place your cursor in this field and delete delete any existing filter values.
Then, paste (CTRL + V) in your new filter from your clipboard and exit the settings panel.
Your widget will now refresh and display listings based on your new filter.
Ideas for Doing More
- Use more widgets to add MLS content to your website
- Use the Wizard to create more widgets to help your marketing.
- See our demonstration website for inspiration and ideas.