A very important feature included with Buying Buddy is the ability to send your leads and clients New-Listing property alerts based on what they are interested in. These alerts are a great way to keep in touch with Buyers and make sure you are staying in the front of their minds.
New-Listing Alerts will send your leads and contacts an email alert when new properties come on the market matching the saved search criteria.
Alerts can be sent throughout the day, daily, weekly, or monthly.
These alerts are a powerful way to automatically incubate and keep in touch with Buyers.
When setup for a specific lead record in the Buying Buddy system, this will run the saved search on the frequency specified, and will then send any new properties found as a Property Alert email.
To Set up Property Alerts
In your Buying Buddy account, find the specific lead for which you want to set up an alert, and view the lead summary panel.
On that lead's detail page, click on Alerts in the tabs.
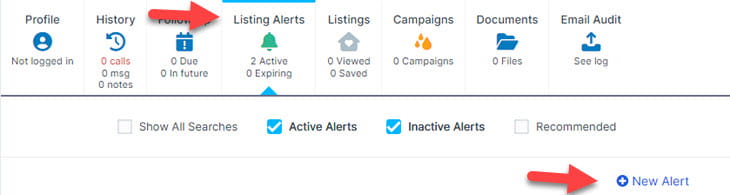
On that tab panel, you will see a summary of all property alerts for that lead. If you haven't set any up yet, this tab panel will be empty.
Click + New Alert shown in the Listing Alerts panel.
STEP-1: Specify the search criteria
The first step is to use the Search Form to specify the criteria for your search alert.
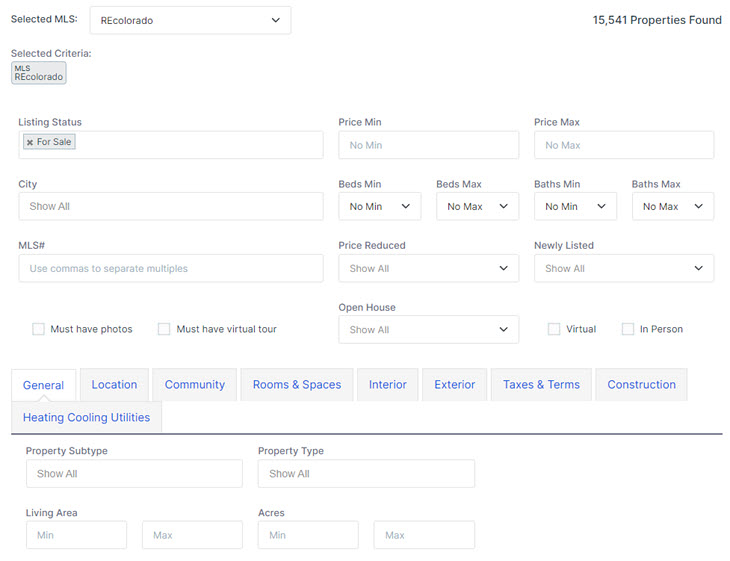
Select all the criteria for which you want to set up the property alert.
TIP: Start by selecting simple search criteria. Adding too many criteria can reduce the number of properties found and may cause alerts to be sent infrequently or not at all.
Select the specific attributes that your client or lead is interested in, so that they only receive alerts for properties that are relevant to their needs.
The Search form has criteria organized into groups under the tabs - click each tab to see all the criteria available.
STEP-2: Preview Search Result
The results panel has additional options at the top of the page:
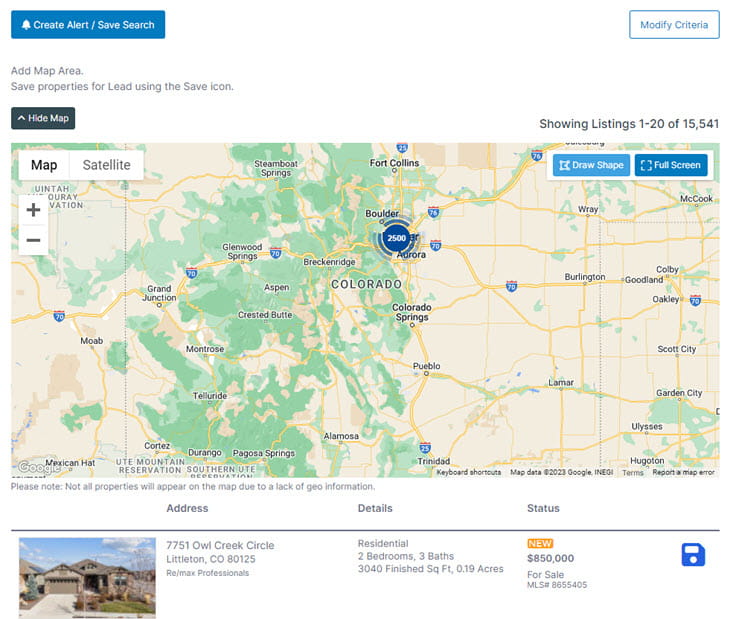
Modify Search will take you back to the previous panel where you can adjust the various criteria
Draw Shape will be shown if the MAP is visible - and this allows you to add a polygon shape to the search criteria.
STEP-3: Alert Settings
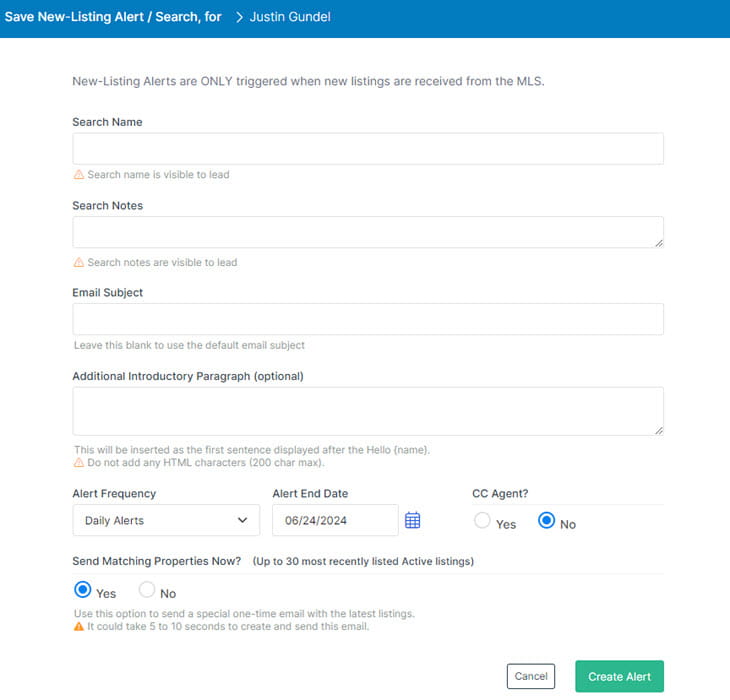
- Search name is used in the email subject
- Search notes are included in the email too
- Email Subject (optional) allows you to create a custom subject if desired
- Search Introduction (optional) will be the first sentence displayed after the Hello {name}
- Alert Frequency: This can be set to Daily, Weekly or Monthly and this is the period on which the search will be run. If any new properties are found since the last search, then the alert will be sent.
- Alert END date: The default is set as being several months out - butt you can change this
- CC Agent: If selected, this option will send a copy of every alert to you as the Agent
- Send Alert Now: If selected, this will send the latest 30 properties (plus a link to see all) to the lead immediately.
Your contact will now receive email property alerts based on the criteria you selected. You can always update and change these if needed.