Groups let you organize your Community Pages into different market categories, each with its own index page. Create groups for luxury properties, condos, waterfront communities, or any market segment you serve.
Prerequisites: This guide assumes you've completed the initial setup and created your first Community Pages. If you haven't yet, start with Community Pages Introduction.
Understanding Groups
When you created your first Community Page, a default group was created automatically. This group will have been named "Featured Areas" (although you can change this) and appears on your Community Hub foundation page.
Groups serve two purposes:
- Organization: Keep related Community Pages together in logical categories
- Marketing: Create separate index pages for different buyer types or property categories
The Default Group
Your default group has special behavior:
- It's created automatically when you make your first Community Page
- It appears on your Community Hub page by default
Why Create Additional Groups?
Additional groups help you target different markets and buyer types more effectively:
Market Segmentation Examples
- Luxury Properties: High-end communities with $1M+ homes
- Condo Communities: Urban buildings and condo developments
- Family Neighborhoods: Areas with top-rated schools
Each group gets its own index page with its own URL, letting you create targeted marketing for specific buyer segments.
Community Page Structure
Once your Community Hub is set up, all your Community-Pages are organized in a three-level structure:
Community Hub, then Groups, then individual community pages.
For example, a WordPress site might show:
yoursite.com/communities/featured-areas/arvada-homes
While sites using our JavaScript plugin will use URLs with filter parameters:
yoursite.com/communities.php?filter=group:featured-areas+community:arvada-homes

How to Create a New Group
- Go to
- Click "Add Group Page"
- Enter a descriptive Group Name (e.g., "Luxury Properties" or "Condo Communities")
- Optionally add a description for the group
- Choose a Layout
- Click "Save"
Your new group is now ready. You can add existing Community Pages to it or create new pages specifically for this group.
Adding Community Pages to Groups
Community Pages can belong to multiple groups. For example, "Coral Gables Waterfront" might appear in both your "Featured Areas" group and your "Waterfront Living" group.
When Creating a New Community Page
In the Community Page creation form, you'll see a Groups selection. Select all groups where this page should appear.
For Existing Community Pages
- In the Community Page Builder, click Edit on the Community Page
- In the Setup tab, find the Add to Group Pages section
- Select and deselect groups as needed
- Click Save
The page will now appear on the index for each selected group.
Accessing and Sharing Group Pages
Critical to understand: Only the default group appears on your Community Hub foundation page. All additional groups need their own navigation links.
Adding Groups to Your Website Navigation
To make additional groups accessible to website visitors:
- Copy the Group Page URL from the Community Page Builder (click the copy icon on the group header)

- Go to your website's menu management system
- Add a new menu item with the copied URL
Tip: You can also use Group Page URLs in email campaigns, social media, and marketing materials to direct specific buyer types to targeted property collections.
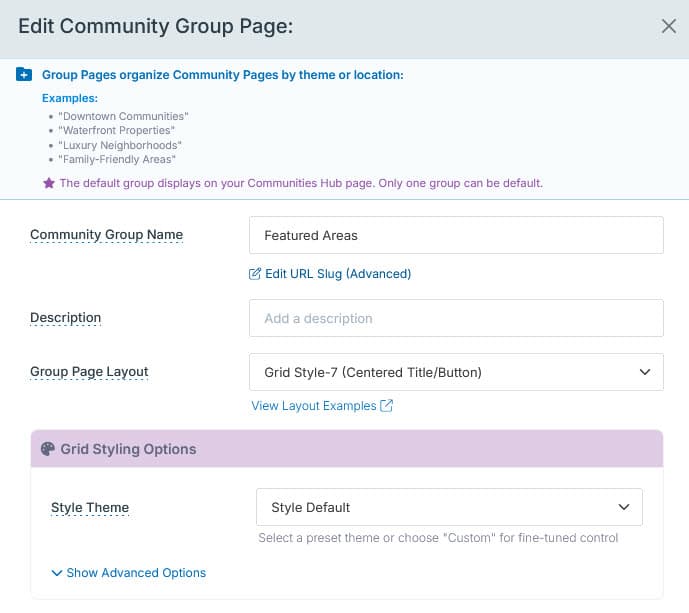
Customizing Group Page Display
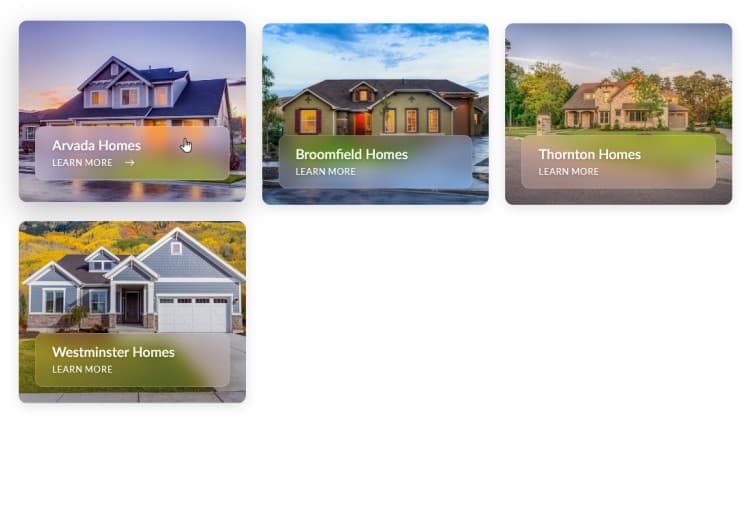
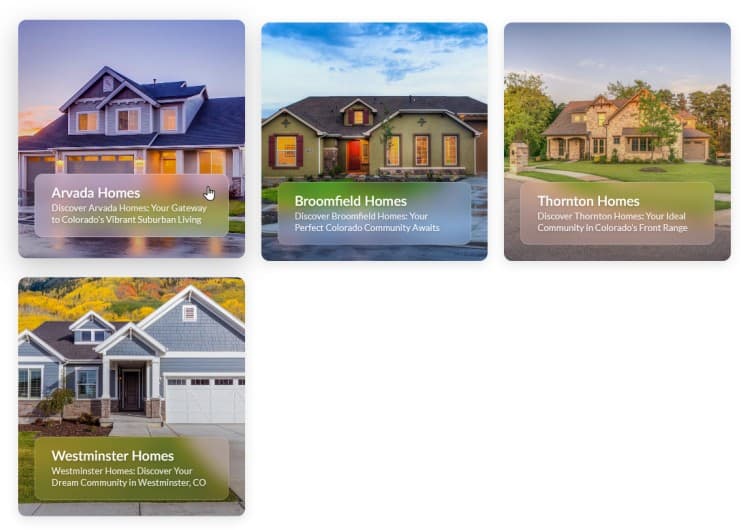
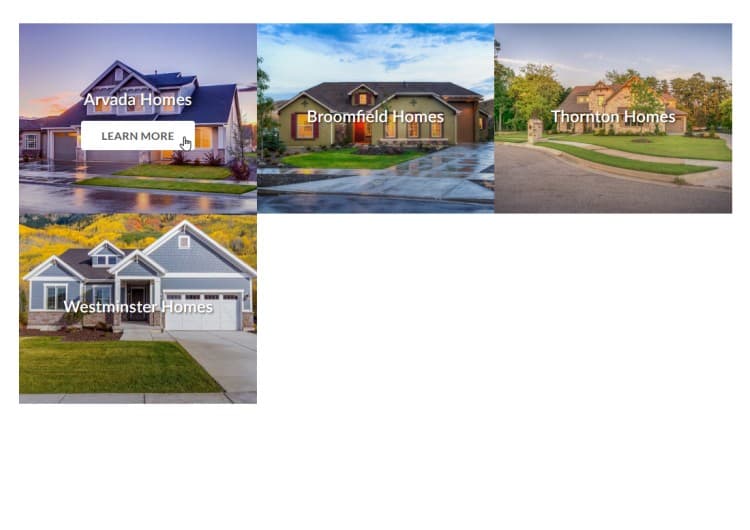
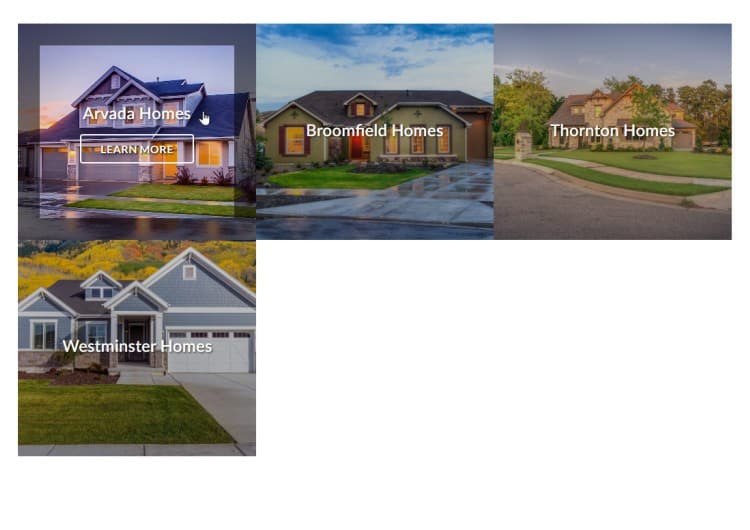
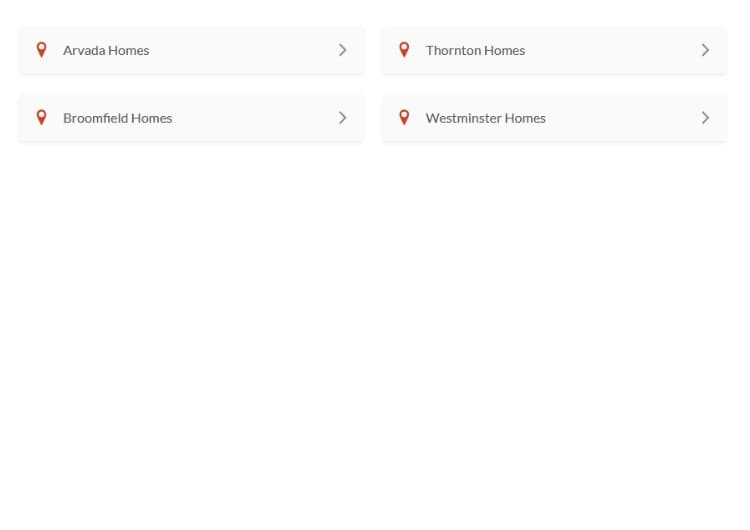
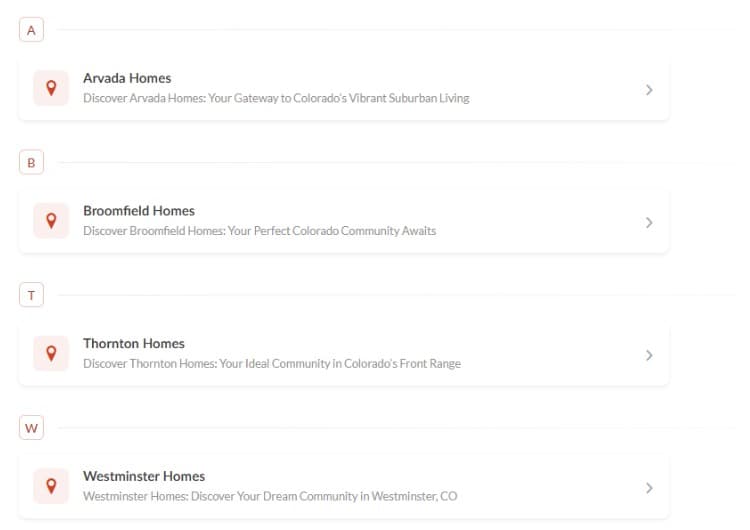
Group Pages act as index pages, displaying links to all Community Pages within that group. You can choose from several layout styles to control how these links appear.
Available Layout Styles
You can view all current layouts from the Add / Edit Group panel.
Click the "View Layout Examples" link under the Group Page Layout field.
Each layout has a default style, but can be adjusted using Advanced Styling options.
Changing the Layout Style
- In the Community Page Builder, find the group you want to customize
- Click the Edit icon button on the group header
- Choose your preferred Display Layout
- Click Save
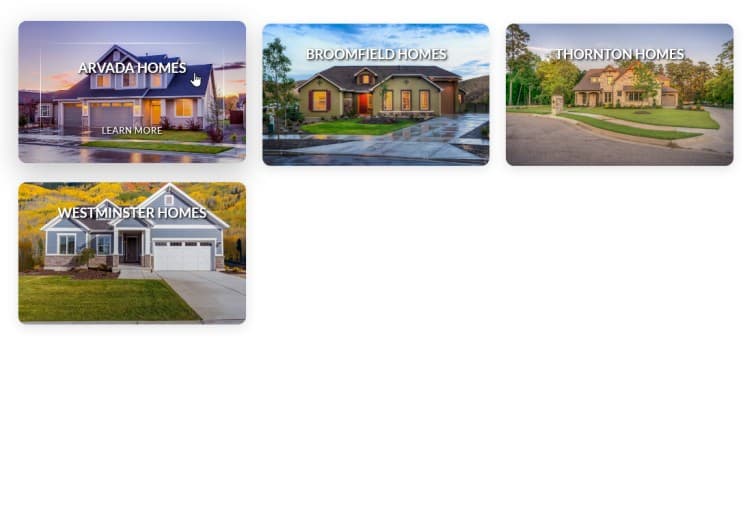
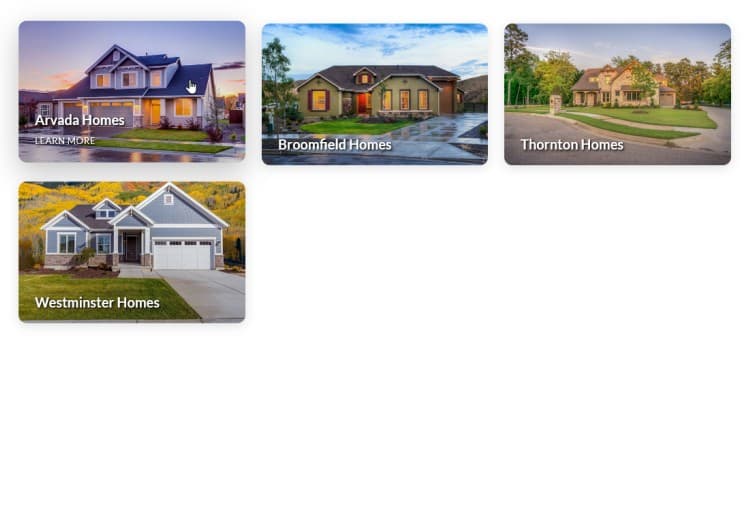
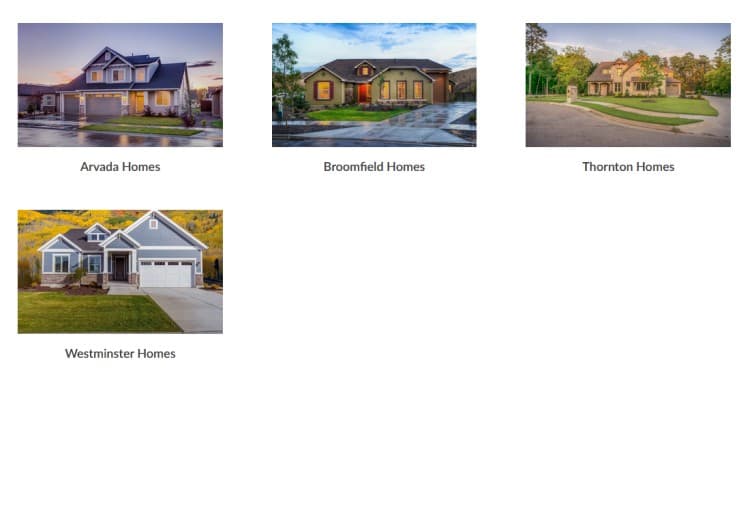
Tip: Gallery layouts look best when you've added custom images to your Community Pages. Start with a simple list layout and upgrade to gallery style as you add images.
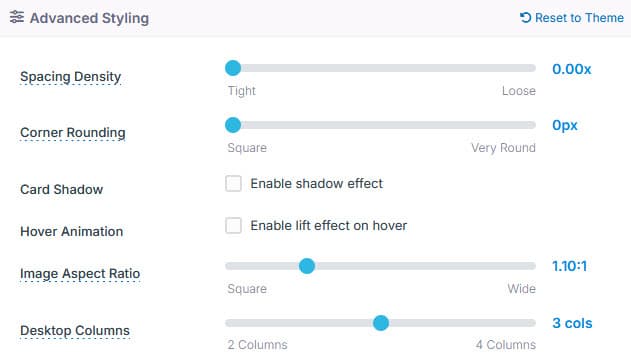
Advanced Styling
Use the Advanced Styling options to tailor the Group Page layout as needed.
Managing and Maintaining Groups
Editing Group Settings
Access group settings using the Edit icon on each group header:
- Edit Name: Change the group name (affects URLs)
- Edit Description: Update the group's marketing description
- Change Layout: Switch between list and gallery displays
- Edit Slug: Once created, all page slugs remain the same. They can be changed if needed but this will mean you need to update any links or menus that use the slug.
Moving Pages Between Groups
To reorganize which Community Pages appear in which groups:
- Click Edit on the Community Page
- Adjust the Groups checkboxes
- Click Save
Remember: pages can belong to multiple groups simultaneously.
Deleting Groups
If you need to remove a group:
- Ensure no Community Pages belong exclusively to this group (assign them to other groups first)
- Click the "trash" (delete) icon in the group header
- Confirm the deletion
Warning: You cannot delete a group if any Community Pages belong only to that group. First reassign those pages to other groups.
Best Practices
Keep Groups Focused
- Each group should represent a clear market segment or buyer type
- Avoid creating too many groups—3-6 groups work well for most agents
- Use descriptive names that buyers will understand and search for
Maximize Visibility
- Add all major groups to your website navigation
- Link to specific groups in email campaigns targeting those buyer types
- Share group pages on social media with targeted messaging
- Use gallery layouts when you've added images to make groups more visually appealing
Strategic Page Assignment
- Assign your best, most-trafficked communities to multiple relevant groups
- Create focused groups for specific marketing campaigns
- Consider which communities appeal to multiple buyer types
Troubleshooting
Group Page Not Showing in Menu
Remember: only the default group appears automatically on the Community Hub. All other groups require you to manually add their URLs to your website navigation.
Community Page Missing from Group
Check that the Community Page is assigned to that group in its edit settings. Pages must be explicitly added to groups—they don't appear automatically based on criteria.
Changed Group Name, Links Broken
When you rename a group, its URL stays the same. If you need to update the slug for any reason then you will need to update any navigation menu items, email links, or social media posts that pointed to the old URL. Copy the new URL from the group header link icon.
Next Steps
With your groups organized and navigation set up:
- Add custom images to Community Pages for better gallery displays
- Create marketing campaigns targeting specific groups
- Monitor which groups get the most traffic
- Expand successful groups with more Community Pages
- Adjust your group strategy based on what resonates with buyers
Groups transform your Community Pages from a simple list into a strategic marketing tool, helping you connect different buyer types with the exact properties they're looking for.